Monday 28 April 2014

Recipe: The Manchester Foodies' Big Mac

They don't look that pretty, but they taste damn good

At work the other day, I found myself listening to the dulcet tones of Aaron Lewis, morosely intoning Staind's “smash” hit It's Been Awhile, and I thought: yes it has Aaron, yes it has.

Given that over two months have passed since my last blog post, it's been a while (correct spelling) is a constant refrain in my head. Don’t worry I'm not going to start busy-bragging. As writers of any creed will know, the desire to pen your thoughts inevitably waxes and wanes. It’s just been one of those waning periods.

But here I am. Writing once again. Wax on, as it were.

So, let’s get back to the task in hand.

Burgers. Most of us eat them. Most of like them. But not many of us go to much effort with them. Pre-ground meat from the supermarket or butcher, store-bought buns, the only creative spark reserved firmly for the toppings. For our American supperclub (read Food Geek’s kind review here) I wanted to go a bit further.
 

The Burger


As always my research started with Serious Eats, Modernist Cuisine and Heston. It would be fair to say that, like some sort of culinary plagiarist, most of my knowledge is culled from these guys. But testing out their processes often leads to new discoveries and slight variations.

Here’s what I learned about burgers:

- If you’re really serious about burger making then you should definitely be making your own mince. Franco Sotgiu was kind enough to donate us a mincer for the supperclub - you can find a good one for around £60 or ask your butcher to do it for you. If you’re not gonna make burgers very often, don’t buy one I guess. But they are useful for making sausages and pasta too.

- The type of cuts you use do matter. You need to find a good balance of fat-content and nicely textured meat. The most common ingredients seem to be chuck, sirloin and rib-eye, which are often augmented by richer, beefier additions: Kenji from Serious Eats uses a bit of oxtail, Modernist Cuisine uses hanger, Heston likes dry-aged shortrib. But no matter what anyone says, I don’t think a burger mince mix should contain expensive, dry-aged meat. Reserve that stuff for steaks and roasts. The cheapest option for a decent burger is to find a well-marbled piece of chuck and dry age it in the fridge for a couple of days. I settled on 50% chuck, 25% sirloin and 25% hanger, but I suggest looking at the Serious Eats guide to the burger blends as a start. We tend to get our meat from Farmer’s Choice, and can vouch for the quality of their steaks in particular. 

Freshly ground mince
 

- I have made the granulated-style burger a la Heston (laying the strands of mince parallel to each other, shaping into a log, then cutting into patties) but I’m not convinced the mouthfeel is that much better than in loosely hand-formed patties. Using a chefs ring or other type of mould will work fine for shaping, just remember not to work or compress the mix too much.

- Chilling your mincer parts as well as your meat makes the whole process much easier, especially when it comes to grinding the fat. Warm fat plus a warm mincer equals smeared greasy bits that will clog the machine. For the meat, fridge cold is fine but 20 mins in the freezer won’t do it any harm. Put the mincer parts in for as long as you want.

- When it comes to the cooking, Heston is a big advocate of regular flipping. If you have a loosely-formed patty, this can prove difficult. So you’re probably going to have to resort to a few minutes on each side tactics or a normal amount of flips. Sous-vide your burgers to 55 degrees c and pan sear if you’ve got the requisite equipment.

The Bun

New York Cult Recipes Bun


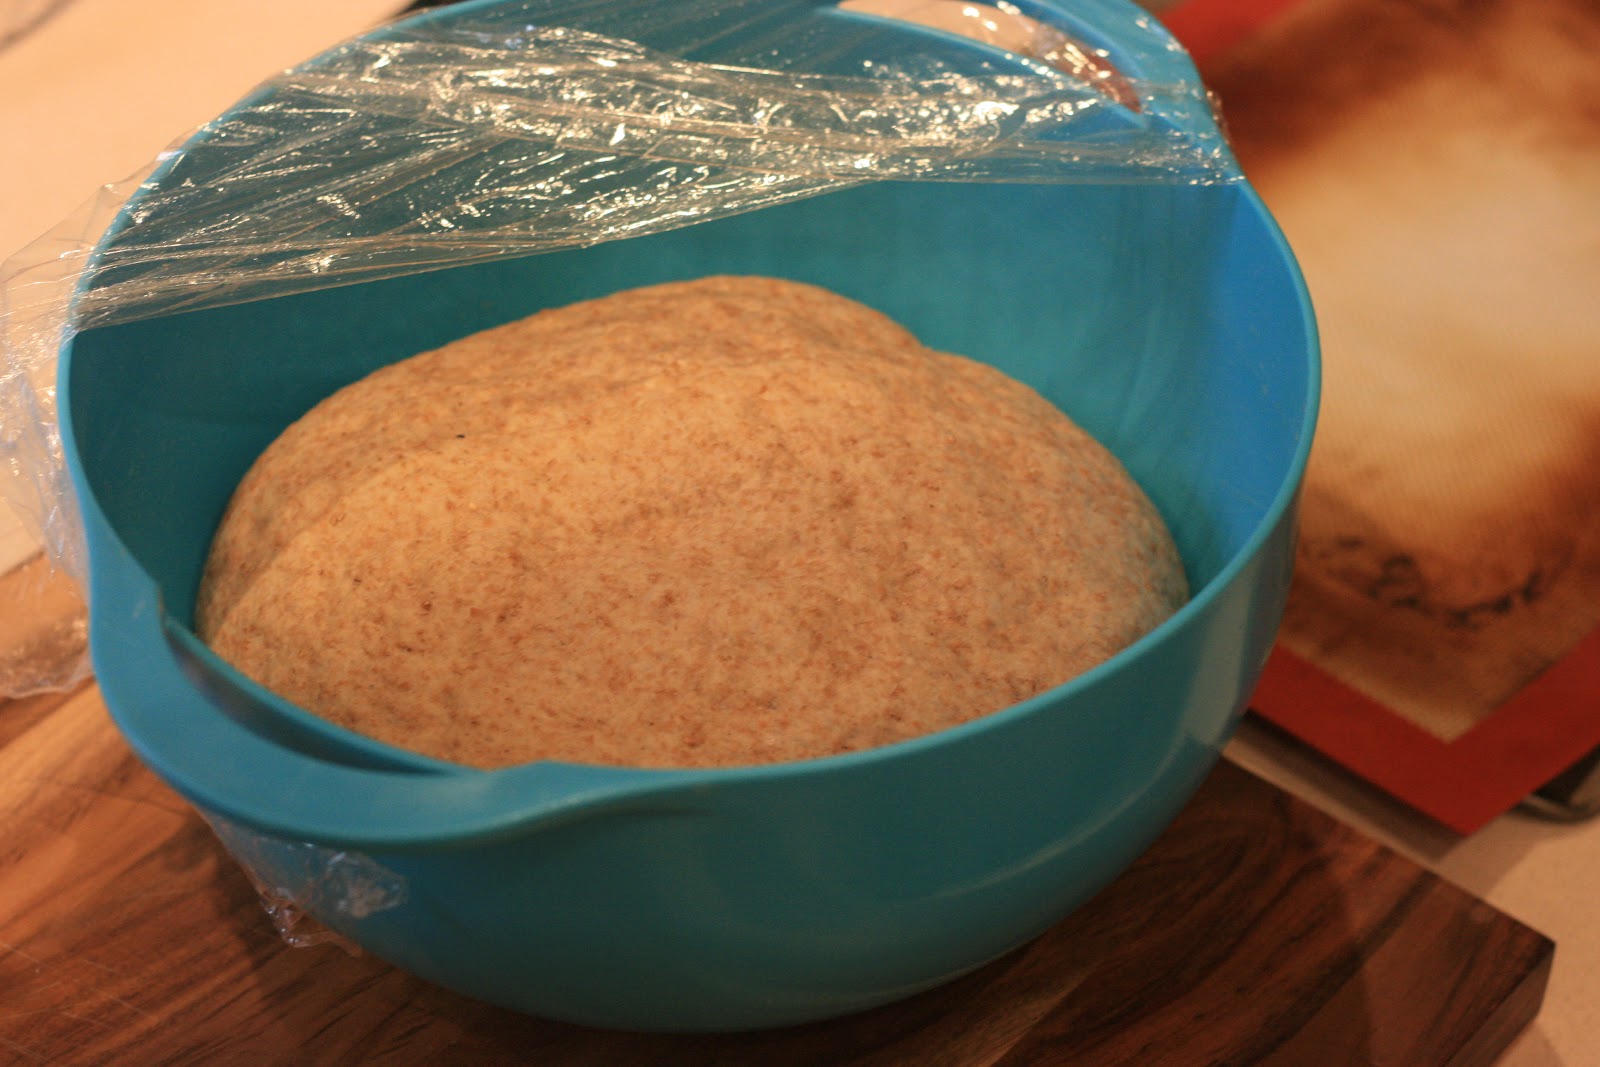
And what about the bun? There’s not time to go into the intricacies of making bread but here’s the upshot of all my googling and recipe testing:

- The three best burger bun recipes I’ve tried so far are Modernist Cuisine’s (which, like Heston’s uses a pre-ferment), the one from New York Cult Recipes, and America’s Test Kitchen’s Potato Burger Buns. The last two are by far the most manageable; Heston overcomplicates things in my view.

- Buns shouldn’t have too much flavour on their own, but like pizza dough should have enough about them to stand up to intense flavours. They need to have sufficient integrity to prevent them falling apart but not enough that they’re dense and chewy. Brioche ticks most of the boxes, and is wonderfully light, but it’s very difficult to work with. Something like a demi-brioche, which will be less rich in flavour, or the above recipes will work well.

- Shaping the buns is the hardest task. Rolling into balls and flattening gives good results but using a ring mould is the best option. Craft your own out of foil for budget-friendly cooking.

- We failed to apply sesame seeds (I know, it's not a real Big Mac without them). To ensure you don't get burnt sesame seeds, apply a little egg white wash to the buns once they've been baked, then sprinkle the seeds atop and grill until set (it won't take very long).
 

The Sauce

It should look something like this


The Big Mac sauce recipe is no secret: not that long ago, McDonald’s Canada released a load of YouTube videos, designed to answer FAQs. One of these questions was “What is in the sauce that is in the Big Mac”? Dan Coudreaut, McDonald’s Executive Chef, gave viewers and approximation of the restaurant’s sauce, but doesn’t give you the exact ingredients.

Based on the video and a bit of playing around I came up with this recipe:

- 50g Mayonnaise
- 25g Branston’s Sweet Relish
- 10g American (French’s) mustard
- ½ tsp of sweet paprika, onion powder, and garlic powder
- enough pickling liquid from a jar of gherkins to loosen the mixture and to taste


Add all ingredients, except pickling liquid, to a bowl set on scales. Add liquid until you achieve the desired consistency (slightly looser than the mayonnaise). 

Pickles, Cheese etc.

Giant homemade cheese slice 

After trying a couple of gherkins/dill pickles, we settled on the Beit Hashita brand. They were closest we found to the kind you'll find in an original Big Mac. For the garnishes, finely mince the onion and leave it in the fridge for a few hours or soak in iced water to diminish the pungency, and shred some iceberg lettuce. Keep it in iced-water if you're bothered about crispness; McDonald's wouldn't bother. 

It's not essential but you can make your own melting cheese slice with practically any cheese by using an emuslifying agent like sodium citrate. The Modernist Cuisine method has been reproduced on the Saveur website. We used mostly cheddar and a little emmental for ours, but the McDonald's site lists vegetarian cheddar as the only cheese in its cheese slices. The cheesy goo needs to be formed into one thin layer before being cut into slices

Well that's about it. If you have any questions leave a comment and if you want to see someone more anal than me try to replicate a Big Mac, try Kenji's post at Serious Eats.

Thursday 9 January 2014

Recipe: Bagels


My bosses live up in Prestwich. I can only assume they enjoy inflicting pain on others, as I regularly watch them eat, in envy, as they devour authentic, sturdy-looking bagels. They assure me I must partake in a bite should I ever venture north of the river. The River Irk, that is, of course.

For, living in Levenshulme as we do, great bagels are in short supply. Until the brilliant Trove get in on the act, it's either trusty old supermarket-shelf New York Bagel Co or make our own. So I decided to rise to the challenge, mainly with the aid of a Christmas present from my sister, Marc Grossman's New York Cult Recipes, and insight from a few twitter foodies (twoodies, anyone?).

Upon initial inspection, bagels look like they could be tricky to make. And, though baking bread has become quite fashionable of late (so much so that I can't count the number of people I've spoken to recently who keep their own sourdough starter), it's still rare to overhear a bagel-related discussion. Whatever apprehensions you might have, making a bagel is actually pretty damn similar to making bread, but with the added simmering stage to give them that classic chewy crust.

The following recipe is almost 100% Marc Grossman's with very small variations. Thanks to Eddie Shepherd for the bicarbonate of soda trick and to Ashley Clarke for an alternative to Grossman's shaping of the dough. Bicarb is great at accelerating Maillard reactions, which helps the dough to brown when baking; there's also great fun to be had spinning bagels on one's fingers to create a hole.

A couple of notes on ingredients: you can buy potato starch from Unicorn in Chorlton and online; malt syrup isn't the easiest thing to find but Unicorn again and Holland & Barrett are your best bets.

Ingredients

Dry Stuff
750g of strong (i.e. bread) flour
7.5g (1.5 tsp) dried yeast

Wet Stuff
375ml lukewarm water
15g (3 tsp) salt
30g (2 tbsp) malt syrup or sugar (not surprisingly, malt syrup gives a darker crumb and maltier flavour)
22.5g (1.5 tbsp) olive oil

For the poaching
3kg water
15g (3 tsp) potato starch
15g (3 tsp) malt syrup
5g (1 tsp) bicarbonate of soda

Method

  • Mix the dry stuff with the wet stuff to form a dough. Make sure to dissolve the salt and the malt syrup in the lukewarm water so they distribute throughout the dough more evenly.
  • If using a stand mixer, knead with the dough hook on a  medium speed until you get a smooth elastic dough which pulls away from the sides of the bowl. If kneading by hand, flour or oil your work surface and work until you get the same effect.
  • Divide the resultant dough into 10 portions (weighing the whole thing, dividing by ten, then portioning out on a scale works well).
  • Shape the portions as per the following picture, rolling into a log and creating the hook:


  • Alternatively, make a ball of dough, poke a hole through the middle with a couple of fingers and spin it around carefully to get the same shape (as advised by one Mr. A. Clarke).
  • Now you're free to place the bagels on a sheet of baking paper or silicone mat and leave to rise for about 1 hour.


Bagels pre-rise


  • Roughly half an hour before you're ready to make the bagels, preheat your oven to 230 degrees celsius.
  • Blend the potato starch with about 250ml of the water and then mix with the remaining poaching ingredients and bring to a boil in a large saucepan. The bicarb might make the liquid foam wildly so keep an eye on it.
  • Lower the heat so the water is simmering and poach each bagel (I imagine cooking more than two at once will be impractical in most household pans) for around a minute on the first side and then flip over for 30 seconds on the other.


Poaching bagels

  • Remove bagels and place on your baking paper/silicone mat where you can top them with sesame seeds, poppy seeds or anything you like (sprinkles?).


Sesame bagels

  • Place the bagels in the oven and lower the temperature to 210 degrees.
  • Cook until done and dark brown about 20-25 minutes.
  • Let cool for a while otherwise the crust will be a little too chewy (as we impatiently learnt!)


The finished article


Monday 30 December 2013

Recipe: Perfect Fried Chicken


Making fried chicken should be a simple activity: take jointed chicken, dip in some kind of binding agent (milk, buttermilk, egg or plain water), dredge in seasoned flour, then fry in fat.

But, in the pursuit of an idealised version, there are always plenty of other questions vying for attention. To brine or not to brine? Skin on or skin off? Which flour or flours? Will plain flour suffice or should you reach for more advanced starches? Which type of fat? Shortening, vegetable oil, soybean? What temperature to fry at? And, perhaps most important of all, what seasonings?

These issues can send an obsessive mind into feverish overdrive. More often than is healthy, I lie awake at night mentally running through the various iterations of fried chicken recipes. And my aim by doing so? To approximate KFC’s recipe.

When put like that, it sounds rather sad, I know. Yet I’m far from alone in puzzling over the secrets that yield such a delicious coating. And the benefit of approximating KFC-style chicken is that you can use decent, organic/corn-fed chicken and have greater control over what you're putting into your gob.

Before we come to a recipe, let’s address the aforementioned issues in turn:
  • Brine by all means, but it’s not really necessary. The coating tends to keep the chicken pretty moist even after a prolonged fry (assuming we're talking about legs and thighs here). If you do brine, make it a really light one: since the coating needs to be over-salted, salty meat can be a case of over-egging the pudding. Go for a 1-1.5% equilibrium brine (i.e. weigh meat and water together then calculate the salt in grams as a percentage of the total mass) and soak for 12-24 hours. Add a couple of bay leaves and crushed garlic cloves for a little extra flavour. You can also brine with milk, buttermilk or yoghurt – these not only tenderise the meat but also give the meat a noticeably white hue.
  • Skin is good. The only flaw is that it can slide off whole, taking the coating with it, leaving naked flesh. If you’ve given your chicken a good brine this shouldn’t be as much of an issue. Skinless chicken should be reserved for burgers in my opinion.
  • Flour is a difficult topic. It depends on how much crunch you want. Pure cornflour, tapioca or potato starch will yield loads of crunch but, while good for wings, too crunchy a batter is not quite what we want for pieces. 1:1 plain flour to cornflour is a good starch but 75% to 25% is even better. Modernist Cuisine’s KFC-copycat recipe suggests a mixture of cake flour, plain flour and wholemeal flour. Cake flour is a low-gluten flour that can be approximated by adding cornflour to normal flour, so that makes sense. I can’t really detect what difference the wholemeal flour makes.
  • Fat is another complicated subject. Shortening was originally used if you believe the KFC instructional video from the ‘80s. What you really want is oil that doesn’t oxidise easily when heated and re-heated (so a stable one), drains easily, and has a neutral flavour. Apparently, KFC now use soybean but groundnut oil is your next best bet.
  • I’ve never had any problems frying at 180 for 12-15 minutes. That tends to yield moist chicken legs and thighs with the right degree of colour on the batter. You're aiming for that almost-orange colour of KFC batter. You can invest in a pressure fryer as used by chicken shops but units start at over £1000. (Some crazy fools use their pressure cooker as a fryer, but we're too, um, chicken to do this).
Modernist Cuisine's Fricken recipe

Seasoning really deserves to be discussed in a place of its own, away from bullet points. Firstly, you need lots of salt. Lots. Typically, using 1-2% salt for batter or dough recipes is a good bet, such as 10g of salt in a 500g bread dough; seasoned flour for fried coatings however need more like 9-10% salt. It sounds excessive but you have to think about how thin the layer of batter is. Using pure table salt yields too harsh a flavour, so go for sea salt like Maldon but ground fine so it disperses in the flour evenly. 2 parts salt to 1 part MSG also works well and will get you closer to fast food style. I tend to put all the seasonings (salt, pepper, herbs and spices) in a grinder together, powder them, then add to the flour.

When it comes to other additions, unless you’re a super-taster I think you’ll be hard pushed to pick up much more than salt, pepper and oil in the average fried chicken batter. However, there's obviously more to it than that - namely that elusive blend of herbs and spices. You can easily Google 'KFC recipe' and find people who claim to have reverse-engineered the Colonel's secret recipe. And, in reality, it's not that difficult a feat if you really set your mind to it. The ingredients of these recipes are hotly disputed nevertheless, with some calling for Jamaican ginger and nutmeg, others for marjoram and mustard powder.

The 'secret' recipe
These herbs and spices are always going to be background flavourings so as long as you don't add too much of a strongly flavoured element (nutmeg or sage for example) you'll stay out of trouble. Don't get bogged down in the exact proportions - a certain degree of spontaneity is fine.

Here's my best attempt at fried chicken thus far:

Awesome Fricken
A mix of chicken legs or thighs (enough for 8 - or even more! - pieces)

Brine:

2 garlic cloves, bashed
2 bay leaves
Water to cover
Salt (1-1.5% of the combined weight of chicken and required water i.e. 500g chicken and 1kg of water would give 15-22g of salt)

Buttermilk

Seasoned flour:

300g plain flour
100g cornflour

30g sea salt
10g MSG

15g black peppercorns
5g white peppercorns

1 tsp paprika
1 tsp onion powder
1/2 tsp caraway
1/4 tsp nutmeg
Generous pinch each of sage, allspice, thyme, cayenne, ground ginger, marjoram, bay leaf (tear off a piece of leaf)

- Combine brine ingredients and mix to dissolve the salt
- Submerge chicken in brine and refrigerate for 12-24 hours. The longer you leave it, the more pronounced a flavour it will have

- Remove chicken from brine and allow to drain a little
- Preheat oil to 180 degrees celsius in deep-fat fryer or pan-thermometer combo
- Combine plain flour and cornflour in a bowl (using a clean washing-up tub is a good idea if you're making a big batch)
- Meanwhile, grind seasonings to a fine powder in a spice/coffee grinder, then whisk into flour mixture until evenly distributed
- Dip the chicken pieces in the buttermilk then place in the seasoned flour
- Shake the bowl/tub to coat the chicken (this way you avoid sticky flour hands - a lid also comes in handy here)
- Remove chicken from the flour and shake off excess coating
- Fry in oil until golden/orangey and cooked through (approx. 12 minutes, though it depends on how fresh the oil is and whether you're using a deep-fat fryer)
- Drain on kitchen roll (and dab off excess oil)
- Consume with unrestrained joy (see Mr Bean above)


Monday 8 July 2013

Recipe: our English Garden Martini

We'd just booked a holiday and the next pay day seemed like a lifetime away. Sainsbury's sent an e-mail asking whether anyone would like a free bottle of gin to write about their 'perfect serve'. As supermarket spirits increasingly overtake well-known industry producers in the International Spirits Challenge awards, it seemed like now was a good time to sell-out and accept a product freebie...

Sainsbury's Taste the Difference Blackfriars Gin  recently won 'gold' in the aforementioned awards, flying past renowned brand names such as Hendrick's, BLOOM, Bombay Sapphire, and even Gin Mare (Jamie's personal fave). Whilst we're yet to try it in a classic Martini, which I suppose is one of the best tests of taste, the cocktail I did make it in was bloody delicious. So here's my 'perfect serve', ideal for the spate of super sunny weather we're currently having...

Whilst the gin was perfectly quaffable in a standard G&T, I wanted to do something a bit different with it, and so decided to create a cold infusion with cucumber. Using the same quantities of cucumber and gin (I used 200g and 200ml - any amount will work, but as this was the first time I was to make it, I wanted to check that it was drinkable first!). Next time, I'm likely to use a full bottle...


Firstly, you'll want to peel your cucumber and chop the hell out of the slippery green thing. Add the same amount of liquid and get whizzing with a hand blender: you'll want a vessel with high sides so you don't give yourself a surprise face mask. Once blended, you'll refrigerate this mixture for a number of hours - the longer the better. (Heston suggests 16).


We were being a bit fancy pants though and popped ours in one of our vacuum seal tubs - which meant that after just a couple of hours, the cucumber flavour had really penetrated the gin. Once the gin has infused for the proposed amount of time, it will need to be fine-strained to remove the cucumber mush! (I reckon someone cleverer than I could turn this mush into some sort of gin-infused cucumber granita...)


This is a little bit time-consuming, but unless you want a cucumber smoothie, totally necessary! I then decided to use this cucumber-infused gin in a taken on the modern-classic 'English Garden Martini'. I cannot reiterate how refreshing this cucumber gin is - it's actually dangerously drinkable... I would thoroughly recommend making a huge vat of this for barbecues this summer. This is most definitely my 'perfect serve' and the gin-aficionado that is Jamie even said that it was one of the best gin martinis he's ever had. High praise indeed! We loved this one so much that we're considering serving it at our next supper club...

English Garden Martini


Ingredients
50ml     Taste the Difference Blackfriar's Gin infused with cucumber
75ml     Cloudy apple juice
12.5ml  Lime juice
7ml       Elderflower cordial
7 - 10   Mint leaves

1. Gently bruise mint leaves with muddler (or rolling pin)
2. Squeeze lime juice into glass part of cocktail shaker
3. Add remaining ingredients and fill glass with ice
3. Ensure top part of cocktail shaker is tightly fitted and SHAKE! 
4. Double strain (with hawthorne and double mesh strainer)
5. Garnish with mint leaf and enjoy!


This post used a complimentary bottle of gin, as provided by Sainsbury's. We were honestly pleased with the quality of the product and as the gin usually retails at £16.50 for a 70cl bottle, think it's a bit of a bargain too!

Thursday 6 June 2013

Brunch Club Recipe no. 1 - Earl-Grey Smoked Salmon

Smoking - best done outside

Whenever I read a piece about smoking foods, someone's always quick to evoke the addictive nature of this 'foodie' pursuit. They'll say things like: "you'll want to smoke everything, even the dog food"; "I can't leave for work without my smoking gun"; "Tarquin's only three but smoked hummus is already his favourite food". So is it all it's cracked up to be? 


Joking aside, it's a good idea to speculate whether it's worth making certain foodstuffs at home, and this applies equally to home-smoked goods. Several items at our Brunch Club have reached such pricey highs in the supermarket that we rarely buy them, preferring to make our own. Take granola for instance: oats, dried fruits, nuts and seeds, mixed together and toasted for more than a Bhutanese family spends on a weekly shop. The cons of making things yourself are usually time- and equipment-related; the pros are you have a better understanding of what's gone into your food and can produce a product that suits you. With our earl grey smoked salmon you get the added benefit of saving a shed-load of money.

Let's take a similar product as a comparison: Heston from Waitrose Lapsang Souchong Tea Smoked Salmon which sells for £4.99 per 100g. I went to Out of The Blue (preferred fishmonger alert!), purchased a side of salmon at roughly £9, cured it and smoked it, ending up with enough salmon to feed 8 people and plenty leftover to fit snugly into several cream-cheese filled bagels. (This said with the caveat that I purchased a smoking gun to facilitate the whole process; but if you can see yourself eating a lot of smoked food, then it's a worthwhile investment and a very fun toy.) Regarding the smoking, I found several recipes which state simply "light the tea leaves" or recommend heating in a wok until smoking. From experience, the former is actually rather tricky to do and produces very little smoke, as anyone who's ever tried to light a cigarette without drawing on it will testify; the latter is prone to filling your house with smoke, never mind the sucking power (ooh,er) of your extractor fan. And burning earl grey is particularly acrid, believe me.

So some sort of dedicated smoking device (a tin or a gun are the cheapest options) will stop your house stinking like Waynetta Slob's ashtray. (The aforementioned problems might be to do with tea so if anyone's got a reliable tea-smoking method do let us know). I don't want to get into the logistics of smoking here as I'm going to assume if you've got a tin or smoking gun then you've read the instructions. If not I'd recommend a blowtorch to get those pesky tea leaves to burst into flames. What I will say is that there are a lot of variations when it comes to curing and smoking times; and my advice is not to obsess about it. The longer the salmon is in contact with the curing mix the drier it will become; with the smoke, the smokier it becomes. Simple. Curing with a 2:1 salt to sugar ratio for 16 hours and smoking for three half-hour periods with fresh smoke gave us a very palatable product. Tea smoke is more subtle than the traditional oak so the salmon can probably take a little more.


Earl Grey Smoked Salmon


1 Side of salmon (approx. 900g)

Cure:
250g salt
125g granulated sugar
A few sprigs of dill, roughly chopped
Leaves from 1 earl grey teabag

For smoking:
Leaves from 2 earl grey teabags

1. Mix salt, sugar and dill together; and moisten the tea leaves with a little water.
2. Cut salmon in two if too large to fit in any container you own.
3. Spread a thin layer of curing mix on the bottom of a container.
4. Place the salmon skin-side down and cover with the moistened tea leaves then the remaining cure (spread less cure on the thinner tail-end areas to prevent over-salting).
5. Cover and place in fridge for 16 hours.
6. Rinse off cure and leave salmon uncovered in the fridge to dry for a couple of hours.
7. To smoke, place salmon on a cooling rack above a bowl of ice inside a large seal-able container (see picture).
8. Use your preferred method to light the tea leaves. Get a decent amount of smoke in the container then seal. Do this outside if possible!
9. Let smoke for half an hour then repeat.
10. Store covered in fridge and slice when ready to eat.

Notes:
- If you're going to the effort of smoking your own salmon then you might as well buy a side as it's more time efficient and the salmon will keep well
- If you do, however, buy a smaller piece just mix up less cure

The finished product

Tuesday 29 January 2013

The perfect slice

The best homemade pizza?

Pizza is one of those foodstuffs that elicit obsessive behaviour. Fanatics will  go to painstaking lengths to recreate the 'perfect' slice. Heston Blumenthal devoted an entire programme to it for his 'In Search of Perfection' series; and I have been guilty of indulging in such fanaticism! Having already put many recipes on trial, it was time to have a stab at the recipe from 'Modernist Cuisine at Home'.

The resting dough
I'd like to say by way of preamble that I won’t advocate trying to mimic a wood-burning pizza oven chez vous. The result might be rewarding but the expense and time detract from what should be a very simple, cheap meal. Buying a thin sheet of metal cut to fit your oven doesn't prove to be that expensive (and might be an investment if you often eat pizza) but what if you've not had the foresight to order one and want pizza pronto? What if you don’t fancy preheating your oven for an hour in this age of astronomical energy costs?  Above all, I felt compelled to master pizza cookery at home purely because the mark-up in restaurants is so high – a Margherita at Pizza Express costs £7.90 and I can imagine it costs well under £1 to make.

Pizza dough formed into balls

I find that placing a baking tray upside down in an oven preheated to its highest temperature will suffice. No, your pizza won’t cook in under 2 minutes per the ridiculous criteria set for authentic Naples pizza but, frankly, do you care? If you really want an authentic pizza you’re probably going to have to bite the bullet and pay for one. The high heat of a wood-burning clay oven will cook the base evenly and give it colour (undoubtedly the biggest challenge) and give you those lovely charred bubbles of dough. I often find that the slightly thicker crust is underdone by the time the topping has cooked.

The rolled and topped pizza

Rolling the pizza base very thinly is the best way to ensure a speedy cooking time and toppings that aren't cremated. The best way to learn how to hand-make a pizza is to watch a video then practice; it's deceptively hard work and tearing the dough while stretching it out is easy to do. Use a rolling pin if you're having trouble and try to ignore the sound of the purists jeering. The making of the dough itself will be that much easier if you own a mixer with a dough hook; though the dough can be easily kneaded by hand as it is not particularly wet.

Purified gluten

Now comes the time to admit that I've been a little disingenuous. The Modernist Cuisine recipe for Neapolitan pizza dough does require a specialist ingredient: Vital Wheat Gluten (Bob's Red Mill brand available on Amazon). Yeast-leavened doughs - like pizza dough - benefit from the addition of extra gluten in its purified form. It gives, in my mind, the right amount of chewiness to the crust and yields a dough that requires less kneading. A brief rest during the kneading process and then a 1 hour period at room temperature and you're ready to go. I'm sure you can forego this ingredient (given it costs £8/500g) as a decent kneading will develop the gluten networks sufficiently.

So, introduction over, now to the recipe:

MODERNIST CUISINE'S NEAPOLITAN PIZZA DOUGH

INGREDIENTS

500g '00' Flour (or '0' Pasta Flour)
310g  Water (cold)
10g     Honey or Agave syrup
10g     Salt
2.5g    Vital Wheat Gluten
2.5g     Active dry yeast


  1. Mix the flour, water, salt, gluten and yeast in the bowl of a stand mixer with the dough hook attached until the dough comes together.
  2. Mix on medium speed for 5 minutes.
  3. Let the dough rest for 10 mins (still in the bowl and attached to the dough hook) and them mix for another 5 minutes.
  4. Transfer the dough to a floured surface, divide into four chunks of roughly 200g each.
  5. Stretch and roll the dough into smooth balls to develop a network of gluten.
  6. Rub the balls with olive oil, cover with clingfilm and leave to rise at room temperature for 1 hour before using.
To make your pizza, preheat your oven to its highest setting (ours reaches 250 degrees) with an upturned metal baking sheet in it. Roll out your dough on a well-floured smooth board - I use the cheap, flexible plastic chopping boards as a makeshift pizza peel. As you can see from my attempt, there's no need to worry too much about getting a uniform circle! Make sure you add enough flour to the board so the dough will slide off easily onto your preheated tray. Cover with store-bought or homemade tomato sauce and your favourite toppings. At the given temperature, they tend to take 6-7 minutes to cook. 


Thursday 22 November 2012

Chicken with wild mushroom risotto


Given that we've still got roughly a month until winter officially sets in, I thought it would be fitting to post a recipe for a most autumnal dish - chicken with wild mushroom risotto and braised lettuce.

'Boring!' I hear some of you exclaim; after all, there is nothing original about the combination or the cooking techniques involved. However, though this may seem a relatively simple meal to prepare, there are a few pitfalls to be avoided.

Risotto, as John Campbell believes, should 'just hold its own weight and [be] free from an excess of butter or stock'. I tend to agree with him. I'm in favour of a risotto where the rice can still be distinguished as an ingredient rather than some glutinous slop. Be careful not to overcook the rice or to add too much liquid.

There are also two schools of thought when it comes to risotto making - the add-the-stock-gradually and the bung-it-all-in-at-once. The former inevitably gives you more control but requires a little more attention - it has always worked well for me so I can't fault it.

Nevertheless, if you want to ease the culinary strain, this is a great method: sweat the onions and rice then add the wine (reduce) then the stock; cook the rice until it is just underdone, with a slight chalkiness to the bite; then, remove from the pan and spread in a thin layer on a silicone mat/parchment paper on a baking tray. (Place the baking tray in the freezer beforehand to facilitate cooling.) This prevents the rice cooking further and you can keep it like this in the fridge for up to 8 hours until you're ready to finish the dish.

How risotto should look (ie. not like rice pudding)
I now use this method for cooking risotto almost exclusively as it then takes only a few minutes to finish off the risotto when you're ready to eat - and you can keep the other elements of your dish warm while you concentrate on the final stage.

As an aside, Anna and I rarely buy chicken breasts as they are so incredibly expensive. I prefer to buy a whole free-range chicken and butcher it reserving the wings for stock and the legs for slow-cooking. Good free-range chicken has an earthiness to it (completely absent in the supermarket produce) which works brilliantly with the wild mushrooms.

Chicken with wild mushroom risotto and braised lettuce

Serves 2

Risotto

100g carnaroli or arborio rice
700ml chicken stock
1 shallot, finely diced
100g fresh or dried wild mushrooms (soaked), thinly sliced
1 garlic clove, bashed with the back of a knife
Tbsp butter
Tbsp parmesan, grated
Dash of truffle oil (optional)

Chives, to garnish

Chicken

2 Chicken breats, skin on 
200ml chicken stock

Lettuce
1 little gem lettuce, separated into leaves
50ml water
50g unsalted butter 

- For the risotto, sweat the shallot and garlic clove over a medium heat until translucent then add the rice and cook for a few minutes without colouring.
 - Add the wine and reduce to a glaze, then begin adding the stock in small increments, allowing the rice to absorb the liquid before adding more and stirring constantly (or add about 400ml of stock at once).
- Repeat until the rice is nearly cooked then remove from the pan and spread in a thin layer on a baking tray and allow to cool.
- Place in the fridge for up to 8 hours.

- Meanwhile, season the chicken breasts with salt and heat a frying pan over a medium heat until hot.
- Place the chicken breasts in the pan skin side down and cook until the skin is golden brown and most of the fat has rendered out.
- Turn over and colour the skinless side then add the chicken stock and baste the chicken with the stock until cooked (approximately 10-15 minutes). 
- Let rest.

- To braise the lettuce, add the lettuce, butter and water to a saucepan, cover with a lid and place over a medium heat. It is done when the leaves have wilted but the core retains a slight crunch (this will not take long).

-To finish, add the cooled rice, some of the remaining warm stock and the butter to a frying pan and cook over a high heat until the rice is done and there is a smooth emulsion of stock and butter
- Add the mushrooms, parmesan, chives, and truffle oil if using and remove from the heat. Taste and adjust for seasoning.

- To plate up, start with a base of braised lettuce leaves, top with risotto then the sliced chicken breats.

- Accompany with the rest of the wine you opened to make the risotto and enjoy.  

Tuesday 13 November 2012

Wholemeal loaf


I've recently been overcome with the desire to make my own bread.

This is due in no small part to Paul Hollywood's book 'How To Bake' and to the Channel 4's 'The Fabulous Baker Brothers'.

This isn't the first time, mind you. I think anyone who's serious about food and interested in living sustainably/cheaply will have attempted to make their own bread, with varying degrees of success.

I'll admit that my first few attempts gave me some good old 'brick' loafs, most likely the result of a lack of technique coupled with a lack of experience. The more practice you get, the more you get a feel for when a dough has been kneaded sufficiently and when it has proved enough, and more likely you will end up with something palatable.

There are also some invaluable tips which will speed you on your way to making brilliant bread:

- If using dried yeast, such as the Doves Farm Quick Yeast, you don't need to reconstitute it with warm water. Adding warm water decreases the proving time, which, although making the whole process quicker, detracts from the flavour of your final loaf and can cause the dough to over-prove. Use cold/tepid water and knead the dough enough to warm and then let rise until doubled in size.
 - Add a little oil or butter to your dough and it will retain a moister crumb. I'd go for rapeseed oil and unsalted butter in regular bread and olive oil for the richer ciabattas and focaccias. Also oiling your work surface instead of flouring it actually makes it easier to knead the dough.
- When you turn on your oven to preheat it, add a baking tray with a little water to create a steamy environment in your oven. It makes for a lighter crust.
- In general, the wetter the dough, the more moist your final loaf will be. So if the dough is dry don't be afraid to add a little more water. It will be harder to work with but persevere! I've had some very wet doughs that will come together with a good bout of kneading. By all means use a stand-mixer if the dough is unmanageably wet.

 The recipes here are Paul Hollywood's and I've added any observations as I see fit. The recipes call for slightly more dried yeast than other recipes I've seen - and the bread is markedly better for it. If you use the ratio 500g flour/ 10g salt/ 10g dried yeast/ 20-40g butter or oil/ and enough water to make a sloppy dough, I don't think you can go far wrong. I've added photos to help you gauge what your dough etc. should look like.

I've been using Dove's Farm flours and their dried active yeast. The amount of water you need to add to the dough will vary depending on the flour you're using.

A quick tip from Mary Berry for softening butter is to put it in body-temperature water (35-40 degrees). This will make it much easier to incorporate into the dough.

Wholemeal Loaf

Ingredients:

400g strong wholemeal bread flour
100g strong white bread flour
10g salt
10g instant yeast
40g unsalted butter
Roughly 320ml tepid water

- Put the dry ingredients in a mixing bowl, adding the yeast and salt to separate sides
- Add the butter and most of the water and mix with one hand (keeping one hand dough-free will make the whole process less messy - you can grab a jug of water, oil, some more flour without coating them in sticky dough)
- Keep mixing until you form a rough dough, using the mixture to clean the insides of the bowl


- Tip the dough out onto an oiled work surface and knead for 5-10 minutes until the dough forms a smooth soft skin.


- Roll into a ball and place in a lightly oiled large bowl and cover with a tea towel. Leave to rise until doubled in size, or at least one hour.


-When the dough has risen, tip it out onto a lightly floured surface, then fold it in on itself and punch it to knock the air out. At this point you can roll the dough into a sausage shape (see below) or make it into any shape you desire, divide it to make rolls or place in a proving basket. I rolled mine then tied it into a knot.


- Place on a tray line with baking parchment or a silicone mat. Cover with a large clean plastic bag and allow to prove for about an hour or til the dough springs back quickly if you prod it with your finger.
- In the meantime, preheat your oven to 200 degrees and place a baking tray filled with a little water in it
- Bake the loaf for about 30 minutes, then check if it's cooked by tapping the base. It should sound hollow.


The loaf worked beautifully with mackerel pate made with smoked mackerel from the Lancaster Smokehouse.

I'll be back soon with posts on how to make brioche and some great crusty dinner rolls.


Tuesday 18 September 2012

Salt-baked Sea Bass


I've seen this method of cooking fish twice in the last month. Firstly, by Daniel Humm of Eleven Madison Park in New York; secondly, by Adam Byatt on Saturday Kitchen. Daniel applies it to Black Bass and Adam to Sea Bass, but the method could be used for any similar, firm, meaty fish. I'm guessing flatfish wouldn't be that suitable and, for me, salmon and trout are better confited. Many vegetables, such as potatoes, beetroot, and celeriac are salt-baked, with equally delicious results. 

The sea bass in this recipe is coated in a mixture of egg whites and salt to protect it from the heat, making it less easy to overcook the flesh. Daniel wraps the fish in crepes before applying the egg/salt mix so that the salt does not fall onto the fish when cutting off the crust. In my experience this isn't essential, since the skin, which is removed after cooking, will catch any falling salt.

So, to start, mix roughly 500g of salt (regular table variety) with enough egg white to give the consistency of wet sand (that is to say, make it spreadable but not runny). It might seem like a lot of salt, but it only costs 30p for a tub and, have no fear, the salt is not going to penetrate the fish.

Then, get your gutted, de-scaled an de-finned fish, and stuff the belly cavity with thyme, lemon, dill, or whatever you fancy. Spread a little of the mixture on a non-stick tray or silicone baking mat, sit the fish on top, then coat with the mixture using a spatula/palette knife (see below). You can make decorations in the salt crust a la Daniel Humm, but it's obviously extra work and not necessary.


Place the bass in an oven at 220 degrees Celsius for 15 minutes per kilogram. My fish weighed about 800g so that's 12 minutes. Remove from the oven and check the temperature. I use a digital thermometer to test doneness - for, me between 45 and 50 degrees Celsius is optimum. The more you go above 50 degrees the flakier and drier the fish will become.


Daniel Humm chooses to serve his bass with nothing but a drizzle of olive oil and some sea salt, whereas Adam Byatt goes for fennel and potted shrimp salad (recipe in the link above). I went for a combination of radish and potted shrimp, dressed in a lemon mayonnaise. Overall, it takes around twenty minutes to complete this recipe, even less if you go for a smaller fish. The salad can be whipped up while the fish is cooking and there's no stress about overcooking the fish as with pan-frying. Good, as well, if you have leftover egg whites from making mayonnaise.


Sunday 16 September 2012

Coronation Chicken

All you need for Coronation chicken - just add one medium sized bird!

Coronation chicken, the stuff buffets are made of... at least in my opinion. I don't think you can really call a buffet 'good' unless there's some of this around. Usually shop bought, I've always thoroughly enjoyed it, but it did make me wonder if this beautiful sandwich filler is that good when pre-packed and processed to high heavens, how amazing must it be if you make it yourself?

I was shocked and somewhat disappointed to learn that one of my favourite colleagues had never eaten coronation chicken. Fortunately for her, I was there to right that wrong. Being part of a team that never misses an opportunity to hold a buffet lunch, the perfect opportunity arose as the lovely Sophie was going on leave to become a married person! A theme had been decided around 'English Garden', so I jumped on the chance to make coronation chicken. I'd been dying to try out Felicity Cloake's perfect version although somewhat apprehensively as it seemed a lot of work was to be involved, and I wasn't mistaken...

For the recipe, please click the link to Ms.Cloake's column, and use this blog entry as an illustrated guide :)

The first step involves poaching a whole chicken. I used a bird that was around 1.25kg, and let it poach for what felt like foreverrrrr. I was slightly naughty and omitted the saffron, as this dish was already turning out to be as expensive as fillet steak topped with foie gras! We also didn't have any cinnamon sticks (which I thought we did) so used cinnamon powder instead. I don't think this makes a massive difference as the chicken is lathered in unctuous curry-mayo sauce anyway.

Not particularly attractive, but then I imagine most of us wouldn't be if feathered & plunged into boiling water either!

After letting it cool, I picked it apart (I love doing that!) and started on making the sauce. It was all fairly straight forward but there are quite a lot of ingredients involved, which led to me also forgetting to add any of the Worcester sauce (despite having neatly lined it up next to my other ingredients as seen above!). I was also nervous about toasting the curry powder as I have a habit of getting distracted and letting things like this to burn, so I usually leave it to Jamie. However, I followed my nose and as soon as I started coughing everywhere after inhaling the curry powder's er, fragant aromas, I took it off the heat, and it certainly did the trick. Do be careful with this bit though as the smell will overpower the kitchen for at least twenty minutes.


I felt that going to the effort of poaching a whole chicken and making the sauce more-or-less from scratch warranted the omittance of homemade mayonnaise, and used trusty Hellman's instead. I'm sure it would be fantastic if you did use the real stuff. (Jamie then decided to make homemade mayo the week after, grr!).

Once all the ingredients are mixed together, and cover the chicken you're supposed to refrigerate and top with toasted almonds before serving. As I made this the night before in order to bring in to work the following day, I toasted the almonds then and left them in the fridge overnight with it. I didn't find this mattered really, but was really pleasantly surprised at the difference toasted almonds make - they really enhance the flavour of the dish and introduce a nice bit of crunchy texture to the dish.

Tubbed up and ready for action!
I think this blog post is here to serve as a warning for those of us who aren't lucky enough to have a job which involves testing various recipes of the same dish (jealous, me?). Even though the dish is relatively straightforward to make, it does take a lot of time - I reckon at least an hour is involved in the prep, and then 1-1.5 hours poaching time. By the end of it, I was regretting my decision to home make this classic British dish, and was ready to throw the towel in and not even bother with those damned almonds. However, on presenting it at work the next day, I took it all back. The response I received was fantastic and everyone really enjoyed it. This version is much better than anything you'll buy at a deli or supermarket: toasting the curry powder really does add more depth of flavour, and the toasted almonds on top are a fantastic touch. Even though this recipe calls for poaching a whole chicken, I'm sure if you had some leftovers from Sunday lunch, that would work just as well and remove a lot of the time involved. I think it would also be great as a canape, and served mine in little lettuce boats a la Waitrose!

Saturday 11 August 2012

A simple supper... and a simpler lunch

Being a passionate and often fastidious cook, I sometimes get bogged down in the intricacies of cooking complicated dishes and neglect simple combinations of ingredients. Reading through a recipe by Heston Blumenthal or Thomas Keller can leave one feeling overwhelmed and wishing simply to concoct an easy dish with tried and tested flavour pairings.

Here it's mackerel, beetroot, and horseradish for a light lunch which takes only a few minutes to prepare; and then a slow cooked duck leg seasoned with five spice, stir-fryed cabbage and sauteed potatoes for dinner.

Mackerel and beetroot with horseradish dressing
Smoked mackerel fillet, 1 per person
Beetroot, pre-cooked
Dressing:
Horseradish sauce, 1 tsp
Extra virgin olive oil, 3 tbsp
Sherry vinegar, 1 tbsp
Salt and pepper
  • Tear the mackerel into bite-size pieces
  • Slice the beetroot into thin circles
  • Combine the horseradish sauce and sherry vinegar then whisk in the olive oil  until emulsified, then season and taste
  • Dress the mackerel and beetroot


Slow-cooked duck leg with cabbage and sauteed potatoes
2 Duck legs
Sea Salt, 2 tbsp
Five-spice powder, 1 tsp
Sweetheart cabbage, finely sliced
Shaoshing rice wine, splash
Soy sauce, to taste
New potatoes, cut into bite-size pieces
Corn oil or butter
  • Sprinkle the salt over the duck legs and rub into the skin and underside, then leave covered overnight in the fridge
  • Preheat the oven to 200 degress then rinse the salt off the duck legs, pat dry, and season with five spice
  • Fry the duck skin side down until most of the fat has been rendered down
  • Place duck legs in a covered casserole dish, put in the oven and cook for roughly an hour and a half
  • To saute the potatoes, pat the cut pieces dry, then heat the oil or butter in a frying pan over a medium heat
  • It is important that the pan be hot enough to brown the potatoes but not too hot that it will burn them
  • Fry the potatoes turning occasionally to make sure all sides are browned (this will take about half an hour)
  • For the cabbage, heat a little oil in a wok then stir-fry the cabbage, seasoning with the rice wine and soy sauce
  • Do this when you are ready to plate up as the cabbage will not take long to cook
  • Sit the duck leg on top of the cabbage and serve with the sauteed potatoes


Tuesday 7 August 2012

Sirloin Steak with Chimichurri

The perfect combination
Mmmm, steak.

For the meat lovers who read this post, I bet you won't be able to resist uttering (even mentally) something similar to 'I wish I had one of those'; and with my sincere apologies to the vegetarians and vegans, I admit that I cannot behold a well-cooked steak without salivating. It speaks to my inner carnivore like nothing else.

In 2009, I travelled around South America for four months. From gorging on coxinha's in Rio to nibbling guinea pig in Cusco, from gigantic pizzas in La Paz to coconut water in Cali, there is one food memory that stands out: carving into slabs of delicious Argentine steak.

The Argentinians tend to cook their steaks on outdoor grills known as parillas, which impart a smokey, char-grilled crust to the already flavoursome cuts of beef. The British weather being slightly more inclement, I tend to cook steaks in a cast-iron griddle pan, and you can still get a delicious brown crust with this method.

Adding some chimchurri sauce I am transported back to those small restaurants in Buenos Aires, Mendoza, and Salta. In Argentina, chimichurri is the condiment of choice for steak and as with anything in the cooking domain there are various recipes for it, but they all revolve around a few central ingredients: parsley, garlic, red wine vinegar and olive oil. Some add coriander, dried oregano, chilli and lime juice.

Chimichurri sauce


For the chimichurri:

Flat-leaf parsley, small bunch (80g packet from the supermarket)
Coriander, small bunch
3-5 garlic cloves, peeled
Red wine vinegar, 1 tbsp
Extra-virgin olive oil, 3 tbsp
Oregano (preferably Mexican), 1tsp
Crushed chillies, a pinch

-Blend all ingredients in a food processor


When it comes to cooking steak, my tips are culled from Heston Blumenthal and his idol, Harold McGee:
  • Take your steak from the fridge, remove any packaging and let come to room temperature for about half an hour (optionally, air-dry in the fridge for 2 days a la Blumenthal)
  • Put a cast-iron pan over a high heat for roughly 5 minutes or until smoking hot
  • Brush one side of the steak with oil then season with table salt (two decent pinches for a normal size sirloin should do it)
  • Lay the steak seasoned side down in the pan, season the other side then turn every 20 seconds or so, until each side had a nice, brown crust and the steak is cooked to your taste
  • The best way to check how the steak is cooked is with a temperature probe (but with a little practice simply pressing the meat will give you a good enough idea)
  • Once cooked, remove from the pan and rest for at least 5 minutes
Another simple method is to brown each side of a steak then put it in an oven at around 100 degrees celsius and check its doneness with a probe. This will tend to give a very evenly cooked piece of meat.

There are other tips and tricks, but if you follow these you can be guaranteed a tasty steak. For me the most salient points are getting the pan really hot, the resting period. and making sure you season the steak enough. It'll take more salt than you think.

With Aldi now doing Aberdeen Angus 28-day-matured sirloin and rib-eye steaks for just less than £4, it's now pretty affordable to eat a decent cut of meat every now and again. While I would always advocate sourcing meat from a reputable butcher, I think it's understandable to go occasionally for the cheaper albeit not so ethical option. I prefer a rib-eye for its flavourful marbling of fat which melts deliciously when cooked.

Wash this all down with a decent Argentine Malbec and dream of eating steaks the size of your head for less than the price of a Big Mac meal. No wonder they restrict how much of it gets across the channel!


Just how I like my steak